 Pin Now
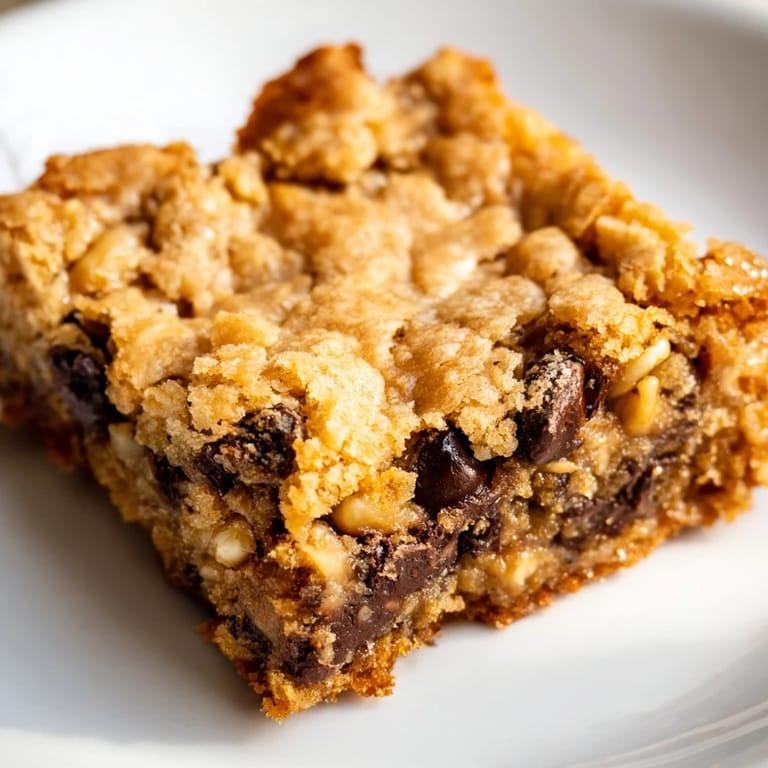
 The first time I made blondies was on a rainy afternoon when I realized I was out of chocolate for chocolate chip cookies. Instead of running to the store, I reached for brown sugar and decided to lean into the caramel undertones I'd been chasing my whole baking life. That batch came out golden, chewy, and deeply satisfying—so much so that I haven't looked back since. There's something about the way melted butter and brown sugar come together that feels almost effortless, yet tastes like you've been planning this treat all along.
I brought a pan to a neighborhood potluck once, and they disappeared before the main course was even finished. A friend grabbed one, took a bite, and asked if they had brown butter in them—they don't, but that's exactly the vibe they give off. That moment taught me that blondies have this quiet confidence about them; they don't need fancy toppings or Instagram-worthy presentation to win people over.
Ingredients
- All-purpose flour: The structure—it keeps these bars tender rather than cakey, so don't sift unless you're fussy about lumps.
- Baking powder and baking soda: A tiny lift that keeps the texture chewy in the middle and just-set on the edges.
- Fine sea salt: This is non-negotiable; it wakes up the brown sugar and keeps the sweetness from feeling flat.
- Unsalted butter, melted: Let it cool for a minute so it doesn't scramble the eggs—this is how you keep the batter smooth and glossy.
- Packed light brown sugar: Pack it in the measuring cup so you're getting the real deal; loose brown sugar changes the ratio entirely.
- Eggs at room temperature: They incorporate faster and create a more cohesive crumb structure.
- Vanilla extract: Use real vanilla if you can; it rounds out the caramel notes and adds a subtle depth.
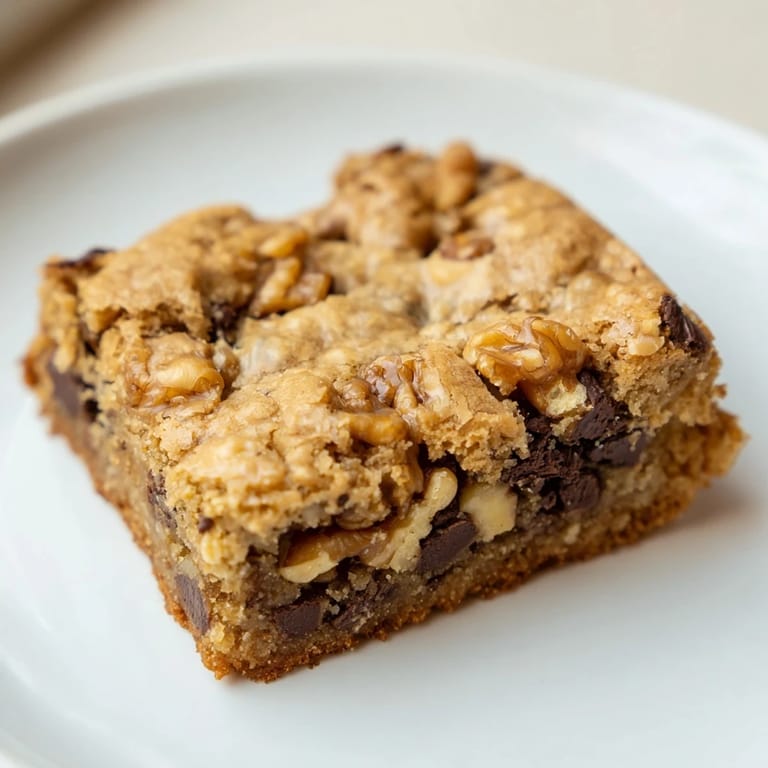
- Semisweet chocolate chips: Don't use chocolate chunks unless you enjoy pockets of melted chocolate; chips distribute evenly and melt just enough.
- Toasted walnuts or pecans: Toasting them first brings out their oil and crunch—store-bought raw nuts can feel mealy by comparison.
Tired of Takeout? 🥡
Get 10 meals you can make faster than delivery arrives. Seriously.
One email. No spam. Unsubscribe anytime.
Instructions
- Get your setup ready:
- Preheat the oven to 350°F and line your 9x13-inch pan with parchment paper, letting the edges hang over the sides. This makes lifting the whole block out at the end almost foolproof, and you'll be grateful when you're tired of dishes.
- Dry team assemble:
- Whisk flour, baking powder, baking soda, and salt in a medium bowl and set it aside. This step prevents lumps and ensures the leavening agents are evenly distributed throughout.
- The butter and sugar moment:
- In a large bowl, whisk the melted butter and brown sugar together until it looks glossy and smooth—about 30 seconds. This is where the magic begins; the mixture should look almost custard-like.
- Eggs go in gently:
- Add eggs one at a time, whisking well after each addition so they fully combine into the butter mixture. If you add them all at once, you risk a broken or separated batter.
- Vanilla joins the party:
- Stir in the vanilla extract and let it hang out with the wet ingredients for a moment.
- Fold in the dry ingredients:
- Using a spatula, fold the flour mixture into the wet mixture with as few strokes as possible—about 10–12 folds until no streaks remain. Overmixing develops gluten and makes the bars tough.
- Chocolate and nuts scatter:
- Gently fold in the chocolate chips and nuts, using the same light hand you used for the flour. These pockets of flavor should feel like surprises in every bite.
- Spread and smooth:
- Spread the batter evenly into the prepared pan using a spatula, working from the center outward. An even spread ensures even baking.
- The crucial bake:
- Bake for 22–25 minutes until the top is golden and a toothpick inserted in the center comes out with moist crumbs—not wet batter, but definitely not dry either. This is the difference between chewy and cakey, so don't rely on time alone.
- Cool completely:
- Let the pan sit on the counter until it's cool enough to touch, then lift the whole block out using the parchment overhang and cool on a cutting board. Cutting warm blondies means they'll crumble; patience here is rewarded.
 Pin Now
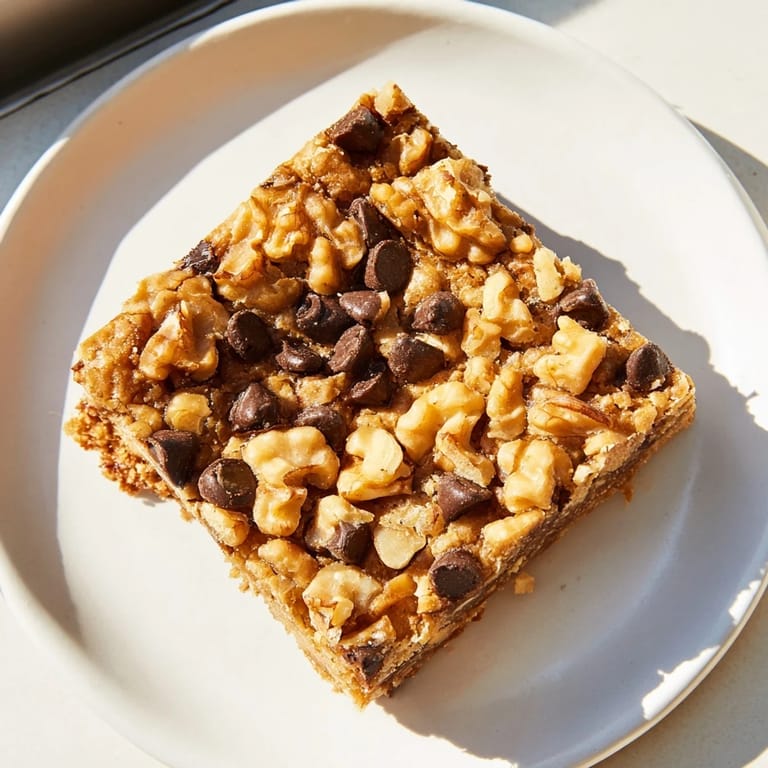
 There's a moment when these cool completely where the aroma fills the whole kitchen with this buttery, caramel-and-chocolate cloud that makes everyone stop and ask what you're making. That smell, more than anything else, is why I keep coming back to this recipe.
Brown Sugar Matters
I learned the hard way that brown sugar moisture content changes everything. Light brown sugar has less molasses than dark, giving these bars a cleaner caramel note rather than a heavy molasses flavor. Packing it tightly into the measuring cup is crucial—loose brown sugar throws off your ratio and can make the bars cakey instead of chewy. If your brown sugar has hardened, soften it in the microwave for a few seconds before measuring.
Chocolate and Nut Choices
The beauty of blondies is how forgiving they are with mix-ins. Semisweet chocolate chips are the classic choice because they melt into the crumb without overwhelming it, but dark chocolate chips work beautifully if you want less sweetness. Walnuts bring an earthy bitterness that balances the brown sugar, while pecans are milder and buttery. Macadamia nuts lean luxe and creamy, or you can skip nuts entirely for a cleaner caramel-chocolate experience.
Storing and Serving
These bars stay fresh in an airtight container for up to five days, though they rarely last that long in my house. The flavor actually deepens on day two as the brown sugar and butter meld further. For an emergency dessert moment, serve them with vanilla ice cream while still slightly warm—the melting ice cream and soft blondie create something that feels almost decadent.
- Freeze cooled blondies in an airtight container for up to three months; thaw at room temperature before serving.
- If you want extra indulgence, drizzle cooled blondies with melted dark or white chocolate and let it set before cutting.
- Pack these for bake sales or potlucks; they're sturdy enough to travel and impressive enough to make people ask for the recipe.
 Pin Now
 Blondies are proof that sometimes the best discoveries come from improvisation and happy accidents. They've become my go-to when I need something that tastes special but doesn't demand perfection.
Recipe FAQs
- → What type of nuts can be used in these bars?
Walnuts or pecans are traditional, but macadamia nuts provide a rich alternative. Nuts can also be omitted for a nut-free version.
- → How do I achieve a chewy texture?
Using melted butter combined with packed brown sugar and careful mixing helps create a chewy, dense texture in the bars.
- → Can these bars be drizzled with chocolate?
Yes, once cooled, drizzling with melted white or dark chocolate adds extra decadence and visual appeal.
- → What is the recommended baking pan size?
A 9x13-inch (23x33 cm) pan lined with parchment ensures even baking and easy removal.
- → How do I know when the bars are baked properly?
The top should be golden and a toothpick inserted comes out with moist crumbs, not wet batter, indicating perfect doneness.
- → Are these bars suitable for vegetarians?
Yes, they contain dairy, eggs, and nuts but no meat products, aligning with vegetarian preferences.