 Pin Now
 My roommate brought a tin of these to a potluck years ago, and I watched them disappear faster than anything else on the table—people were actually fighting over the last piece. That's when I realized some desserts don't need complexity or technique; they just need the right combination of textures and flavors working together. Once I made my first batch, I understood the magic wasn't in the baking, it was in how those layers came together, each one adding something the others couldn't.
I made these for my sister's book club, and she told me later that someone asked for the recipe three times during the evening. There's something about a dessert you can hold in your hand, eat without a fork, and actually taste the individual ingredients that makes people feel like they're getting away with something delicious.
Ingredients
- Graham cracker crumbs: Buy pre-crushed or pulse whole crackers in a food processor—fresh ones hold together better than stale ones.
- Unsalted butter, melted: Melting it first means the crust binds immediately without extra mixing.
- Semi-sweet chocolate chips: Don't upgrade to premium here; standard baking chips have just enough cocoa to balance the sweetness.
- Butterscotch chips: These are optional but they add a subtle depth that keeps the bars from tasting one-dimensional.
- Sweetened shredded coconut: The texture is everything—toasted or raw both work, but toasted gives a nuttier finish.
- Pecans or walnuts: Chop them yourself rather than using pre-chopped; they stay fresher and the size matters for how they distribute.
- Sweetened condensed milk: This is the secret ingredient that makes the whole thing work—it sweetens, binds, and keeps everything chewy.
Tired of Takeout? 🥡
Get 10 meals you can make faster than delivery arrives. Seriously.
One email. No spam. Unsubscribe anytime.
Instructions
- Build your crust:
- Mix the graham crumbs and melted butter until it looks like wet sand, then press it firmly into the pan. Don't be gentle here; you want it compact so it stays together when you bite into the bar later.
- Pour the binder:
- Drizzle the condensed milk evenly across the crust, using the back of a spoon to spread it if needed. It'll look thin, but trust it.
- Layer with abandon:
- Scatter the chocolate chips, butterscotch chips, coconut, and nuts over the milk in whatever order feels right. There's no wrong way—just make sure each ingredient gets represented in every bite.
- Press and compact:
- Use a spatula to gently press everything down, anchoring the layers together. You're not crushing anything, just making sure the milk seeps up and binds everything.
- Bake until set:
- Pop it in a 350°F oven for 25 to 30 minutes, watching for golden edges and a center that no longer jiggles. The top won't brown much, so look at the edges for your cue.
- Cool completely:
- Let it sit on the counter until it's room temperature, then refrigerate for a cleaner cut. Warm bars will fall apart; cold ones slice like butter.
 Pin Now
 A friend called me crying once because her mom's favorite dessert was no longer available at a bakery she loved. I made her a batch of these the next day, and while they weren't the same, she ate two and said it was the kindest thing someone could have done. That's when I realized these bars had become comfort food, not just a treat.
The Art of Layering
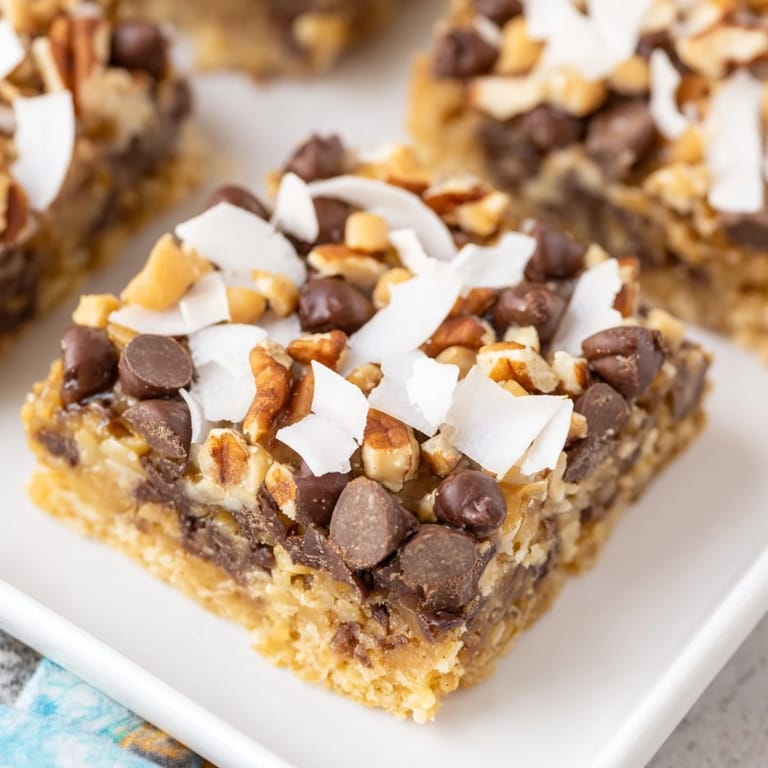
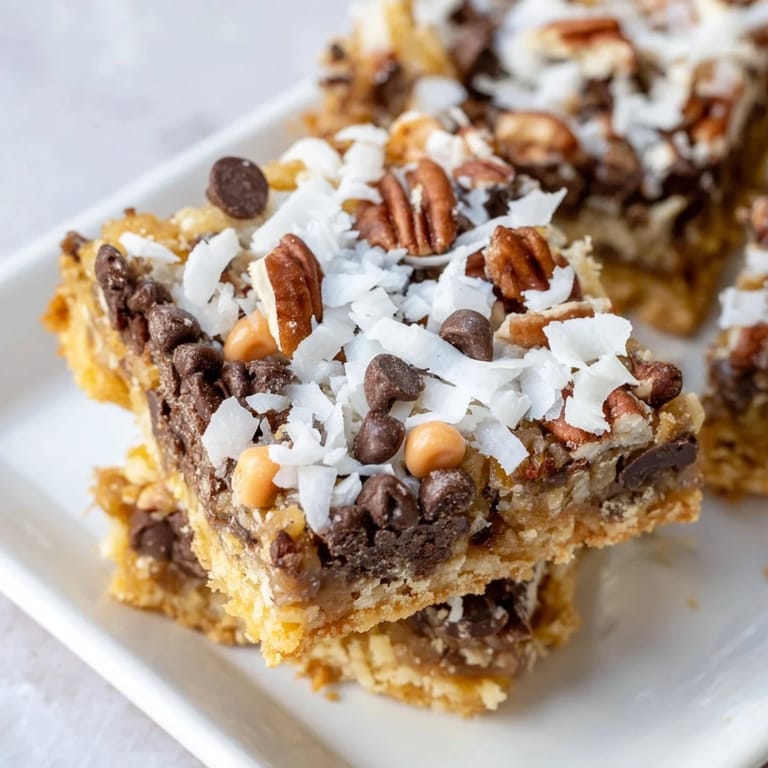
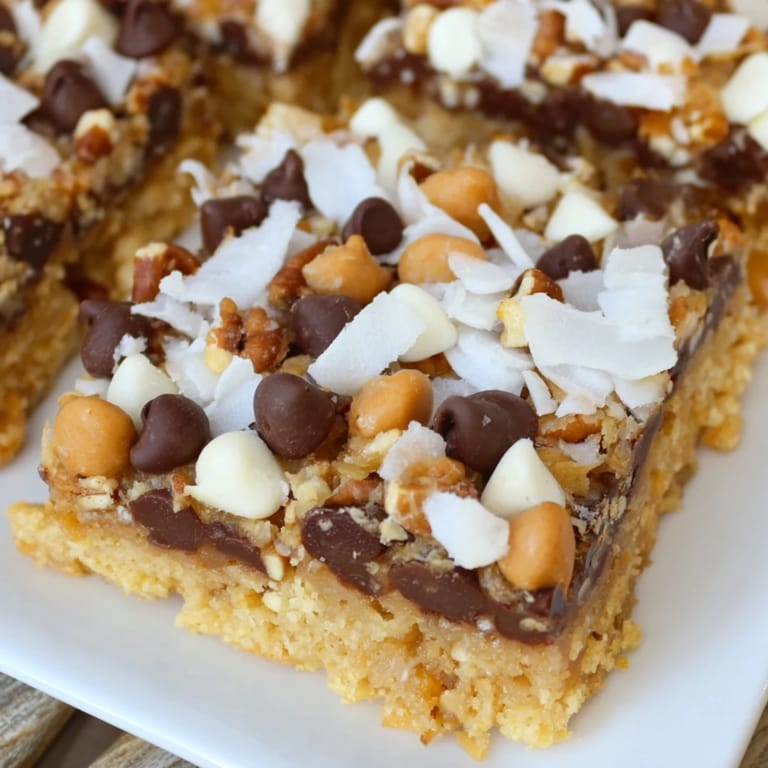
The reason these work so well is that you're not relying on any single ingredient to carry the whole dessert. The chocolate and butterscotch add richness, the coconut brings texture and tropical sweetness, and the nuts add crunch and earthiness. The crust grounds everything, and the condensed milk ties it all together. It's a lesson in balance—each element does one job perfectly, and together they create something greater than the sum of the parts.
Storage and Sharing
Keep them in an airtight container at room temperature, and they'll stay fresh for five days, though they usually don't last that long. If you need them to last longer, freeze them for up to two months—they thaw beautifully without losing texture. I always make an extra batch just so I have some to hand off to neighbors or bring to work.
Variations That Work
The beauty of this recipe is that it's forgiving enough to swap in your favorite ingredients without much consequence. If you don't like coconut, add pretzels or crushed cookies instead; if you want white chocolate, use that in place of butterscotch. You can even add a pinch of sea salt on top before baking for a sweet-salty kick, or drizzle melted chocolate over the cooled bars for an extra indulgent finish.
- Try swapping almonds or macadamia nuts for the pecans to change the flavor profile completely.
- Add a teaspoon of vanilla extract to the crust for subtle depth.
- Sprinkle fleur de sel on top right after baking for sophistication.
 Pin Now
 These bars prove that the most memorable desserts aren't the ones requiring fancy technique or unusual ingredients. They're the ones that show up warm with a friend's handwriting on the label, ready to be shared.
Recipe FAQs
- → What type of crust is used for these bars?
A buttery graham cracker crumb crust forms the base, providing a crunchy and flavorful foundation.
- → Can I substitute nuts in the layering?
Yes, pecans can be swapped for walnuts or almonds according to preference.
- → Is it possible to add extra richness to the bars?
Drizzling melted chocolate over cooled bars enhances richness and adds a luscious finish.
- → How long should the bars bake?
Bake for 25 to 30 minutes until edges turn golden brown and the center is set.
- → What is the best way to store these layered bars?
Store in an airtight container at room temperature for up to five days to maintain freshness.